1
/
of
4
Uploader
Kubota L4100 Tractor Service Manual
Kubota L4100 Tractor Service Manual
Regular price
$33.00 USD
Regular price
Sale price
$33.00 USD
Unit price
/
per
Taxes included.
Shipping calculated at checkout.
Couldn't load pickup availability
Kubota L4100 Tractor Workshop Manual – 346 Pages
Format: PDF
Publication: 9Y111-02781
Language: English
Description
Kubota L4100 Tractor Workshop Service Manual
Kubota
Tractor
Model L4100
Format: PDF
Publication: 9Y111-02781
Language: English
Kubota L4100 Tractor Workshop Manual – 346 Pages
Table of Content of the Workshop Service Manual
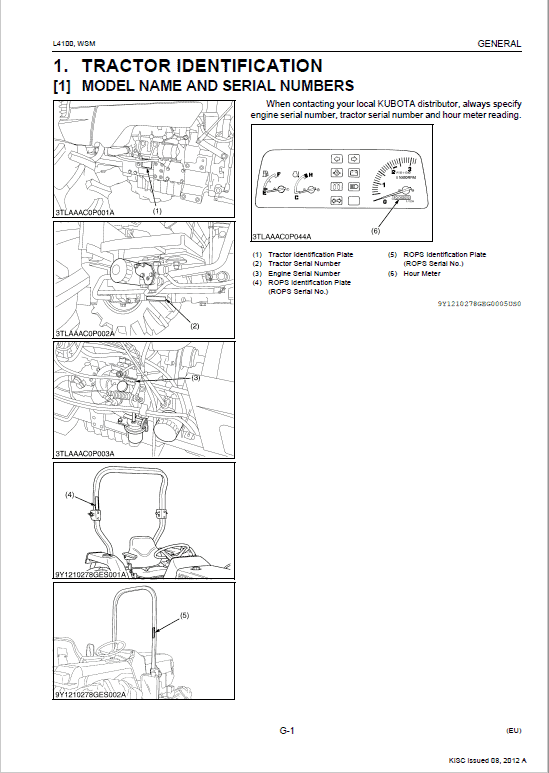
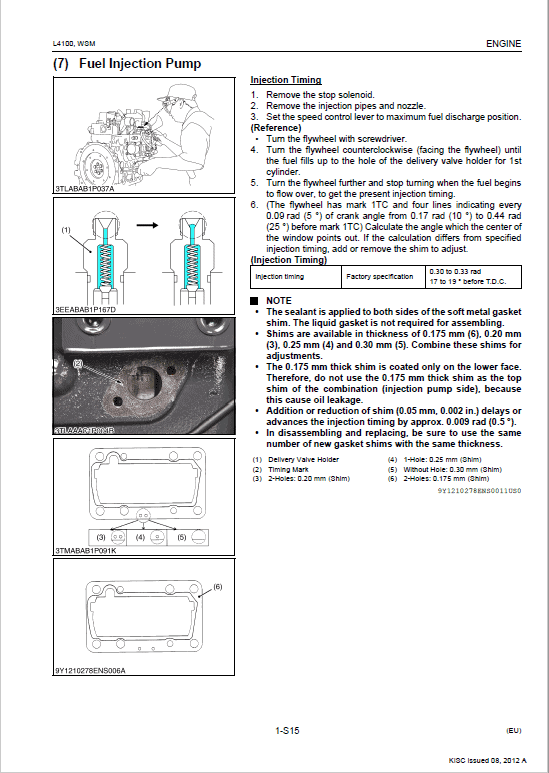
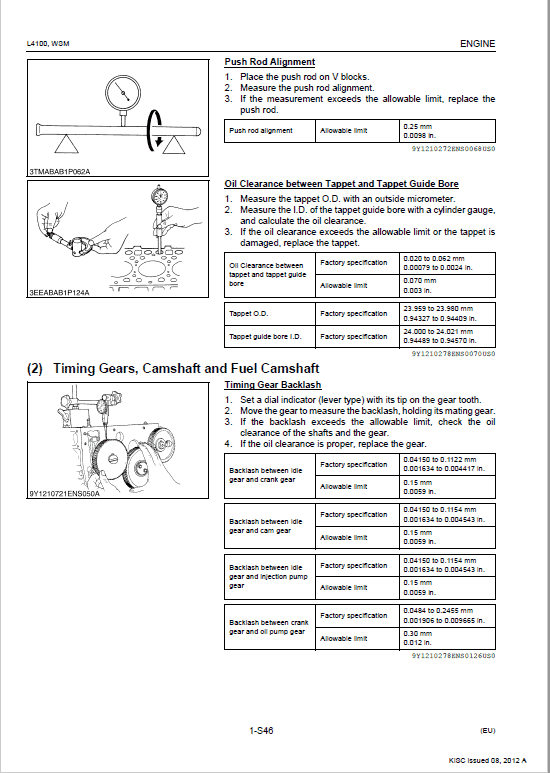
This Workshop Manual tells the servicing personnel about the mechanism, servicing and maintenance of the L4100. It contains 4 parts: "Information", "General", "Mechanism" and "Servicing".
– Information
This section contains information below.
• Safety First
• Safety Label
• Specification
• Dimension
– General
This section contains information below.
• Engine Identification
• Model Identification
• General Precautions
• Maintenance Check List
• Check and Maintenance
• Special Tools
– Mechanism
This section contains information on the structure and the function of the unit. Before you continue with the subsequent sections, make sure that you read this section.
Refer to the latest version of Workshop Manual for the diesel engine / tractor mechanism that this workshop manual does not include.
– Servicing
This section contains information below.
• Troubleshooting
• Servicing Specifications
• Tightening Torques
• Checking, Disassembling and Servicing
Manual Extract – Oil Clearance between Crankpin and Crankpin Bearing
1. Clean the crankpin and crankpin bearing.
2. Put a strip of plastigauge on the center of the crankpin.
3. Install the connecting rod cap and tighten the connecting rod screws to the specified torque, and remove the cap again.
4. Measure the amount of the flattening with the scale, and get the oil clearance.
5. If the oil clearance exceeds the allowable limit, replace the crankpin bearing.
6. If the same size bearing is useless because of the crankpin wear, replace it with an undersize one referring to the table and figure.
NOTE
• Never insert the plastigauge into the crankpin oil hole.
• Be sure not to move the crankshaft while the connecting rod screws are tightened.
Share


